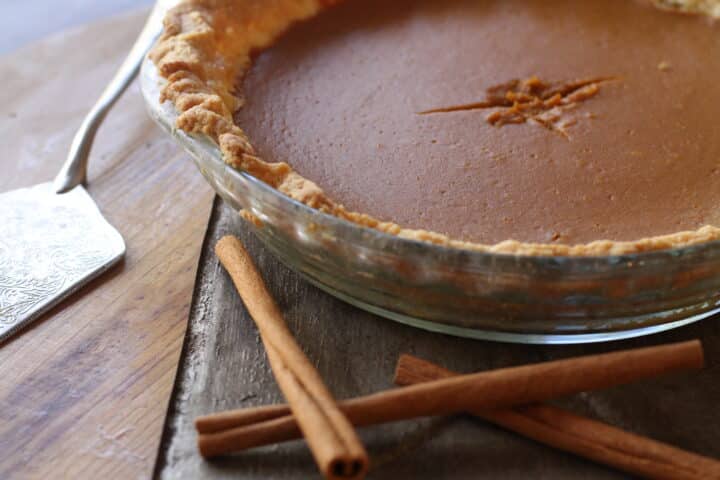
This easy classic pumpkin pie recipe has been passed down and perfected through generations. It's smooth, creamy, and perfectly spiced with just the right touch of sweetness. The kind of pie that brings everyone to the table and keeps them there a little longer. What began as my mom's Thanksgiving pie has become a family cornerstone. It's a dessert that marks the start of the holidays, the sound of laughter in the kitchen, and a reminder of the faithfulness that fills our lives. Prep Time: 25 mins | Bake Time: 55-60 mins | Total Time: 1 hr 25 mins | Yield: 2 (9-inch) pies / about 16 servings.

A Family Tradition of Faith, Gratitude, and Pie
Every Thanksgiving, the day before the big meal, our kitchen turns into a joyful mess of flour, laughter, and cinnamon. My mom, my sisters, my nieces, and now my daughter; we all gather to bake together. It's not just tradition anymore; it's legacy.
As the pies bake, the house fills with that familiar scent: warm spice, butter, and caramelizing sugar. It always reminds me of why we gather. Not for perfection, but for gratitude. Gratitude for what we have, for the people who surround us, and for the salvation we've received in Christ.
And every year, as we pull these pumpkin pies from the oven, I'm reminded that the simplest recipes often carry the most meaning. Make sure to check out Kendra's 12 Favorite Fall Recipes; a collection of cozy, faith-filled seasonal bakes that includes my famous Moist Pumpkin Spice Muffins!
Jump to:
- A Family Tradition of Faith, Gratitude, and Pie
- Why You'll Love This Pumpkin Pie
- Why This Recipe Works
- Ingredients You'll Need (and Why They Work)
- What is Pumpkin Pie Spice?
- Fresh or Canned Pumpkin? Here's Why Canned Wins
- Making the Perfect Crust
- How to Make From Scratch
- Tips, Tools, and Baking Science
- Variations, Make Ahead, and Storage
- Recipe FAQs
- Recipe
- Easy Classic Pumpkin Pie Recipe
- A Thanksgiving Reflection on Gratitude
- What to Bake Next
- 👩🏻🍳 Follow Us!
- ⭐ Our Other Related Recipes
- Comments
Why You'll Love This Pumpkin Pie
In all honesty, I think this is the American pumpkin pie recipe! This pie is rich, smooth, and deeply comforting, just like the holidays should be.
- Easy and reliable: Simple, no-fuss instructions you can trust every time.
- Perfectly balanced: A creamy, spiced custard with just enough sweetness and warmth.
- Family-tested for decades: Passed down and gently improved over the years.
- Ideal for gatherings: Makes two pies; one for the table, one to share.
- Freezer-friendly: Perfect for busy Thanksgiving weeks or make-ahead baking.
Why This Recipe Works
When you understand why this pie bakes up beautifully, you can recreate it with confidence.
- Balanced ingredients: The ratio of eggs, sugar, and milk creates a custard that sets cleanly without curdling.
- High-then-low baking method: Starting at a higher temperature helps the crust set quickly while gently cooking the filling for a creamy texture.
- Canned pumpkin for consistency: Controlled moisture content ensures a perfectly smooth, stable filling every time.
Ingredients You'll Need (and Why They Work)
Each ingredient serves a clear purpose. Here's what makes this pie so reliable:
- Pumpkin puree: Use high-quality canned pumpkin for rich flavor and perfect texture. (See Fresh vs. Canned Pumpkin below.)
- Eggs: Provide structure and creaminess, turning the liquid mixture into a custard.
- Brown sugar: Adds depth through molasses, giving a warm caramel flavor.
- Evaporated milk: Creates a silky, smooth custard without heaviness.
- Orange juice: Adds a touch of acidity that brightens the spices.
- Flour: Helps thicken the filling just enough for clean slices.
- Salt: Balances sweetness and enhances flavor.
- Ginger & cinnamon: The foundation of pumpkin spice; warm, bold, and aromatic.
- Two unbaked 9-inch pie crusts: Homemade is always best - try my The Best Easy Pie Crust Recipe (Flaky & Foolproof) - but store-bought works too if you're short on time.
The secret to a truly memorable pumpkin pie is balance, and the warm blend of pumpkin pie with pumpkin pie spice is what transforms this simple dessert into something restaurant-quality.
What is Pumpkin Pie Spice?
What is in pumpkin pie spice? It's the art of balance of cinnamon and ginger, each releasing their aromas at different points during baking. The gentle heat of ginger and the sweetness of cinnamon elevate the pumpkin's natural flavor into something rich, fragrant, and unforgettable. The fat in the custard helps these spices bloom evenly, creating that deep, layered warmth that defines pumpkin pie with pumpkin pie spice. This harmony of flavor transforms a traditional Southern-style pumpkin pie into something restaurant worthy. Smooth, aromatic, and perfectly spiced in every bite.
Fresh or Canned Pumpkin? Here's Why Canned Wins
I've tried it every way imaginable. Fresh pumpkin roasted and puréed, and straight-from-the-can pumpkin puree. Every time, I come back to canned, not homemade pumpkin puree and here's why:
- Consistency matters. Fresh pumpkin can vary in water content and texture. Too much water dilutes the flavor and can make the filling loose. Canned pumpkin (especially Libby's 100% Pure Pumpkin) has an ideal moisture balance that guarantees a firm, creamy set.
- Flavor concentration. Canned pumpkin is made from specially bred varieties with naturally higher sugar and lower fiber, producing a deeper, more complex flavor.
- Reliability. Canned pumpkin ensures the same results every time (no surprises).
- Expert-approved. America's Test Kitchen ranks Libby's as the best for taste and texture. My mom used it long before they said so, and I still do, too.
When it comes to pumpkin pie filling, canned isn't a shortcut; it's a smart choice.
Making the Perfect Crust
A great pumpkin pie starts with a great crust. For this recipe, I always use The Best Easy Pie Crust Recipe (Flaky & Foolproof); the same one my mom taught me to make years ago.
Here's why it's perfect for custard pies like this:
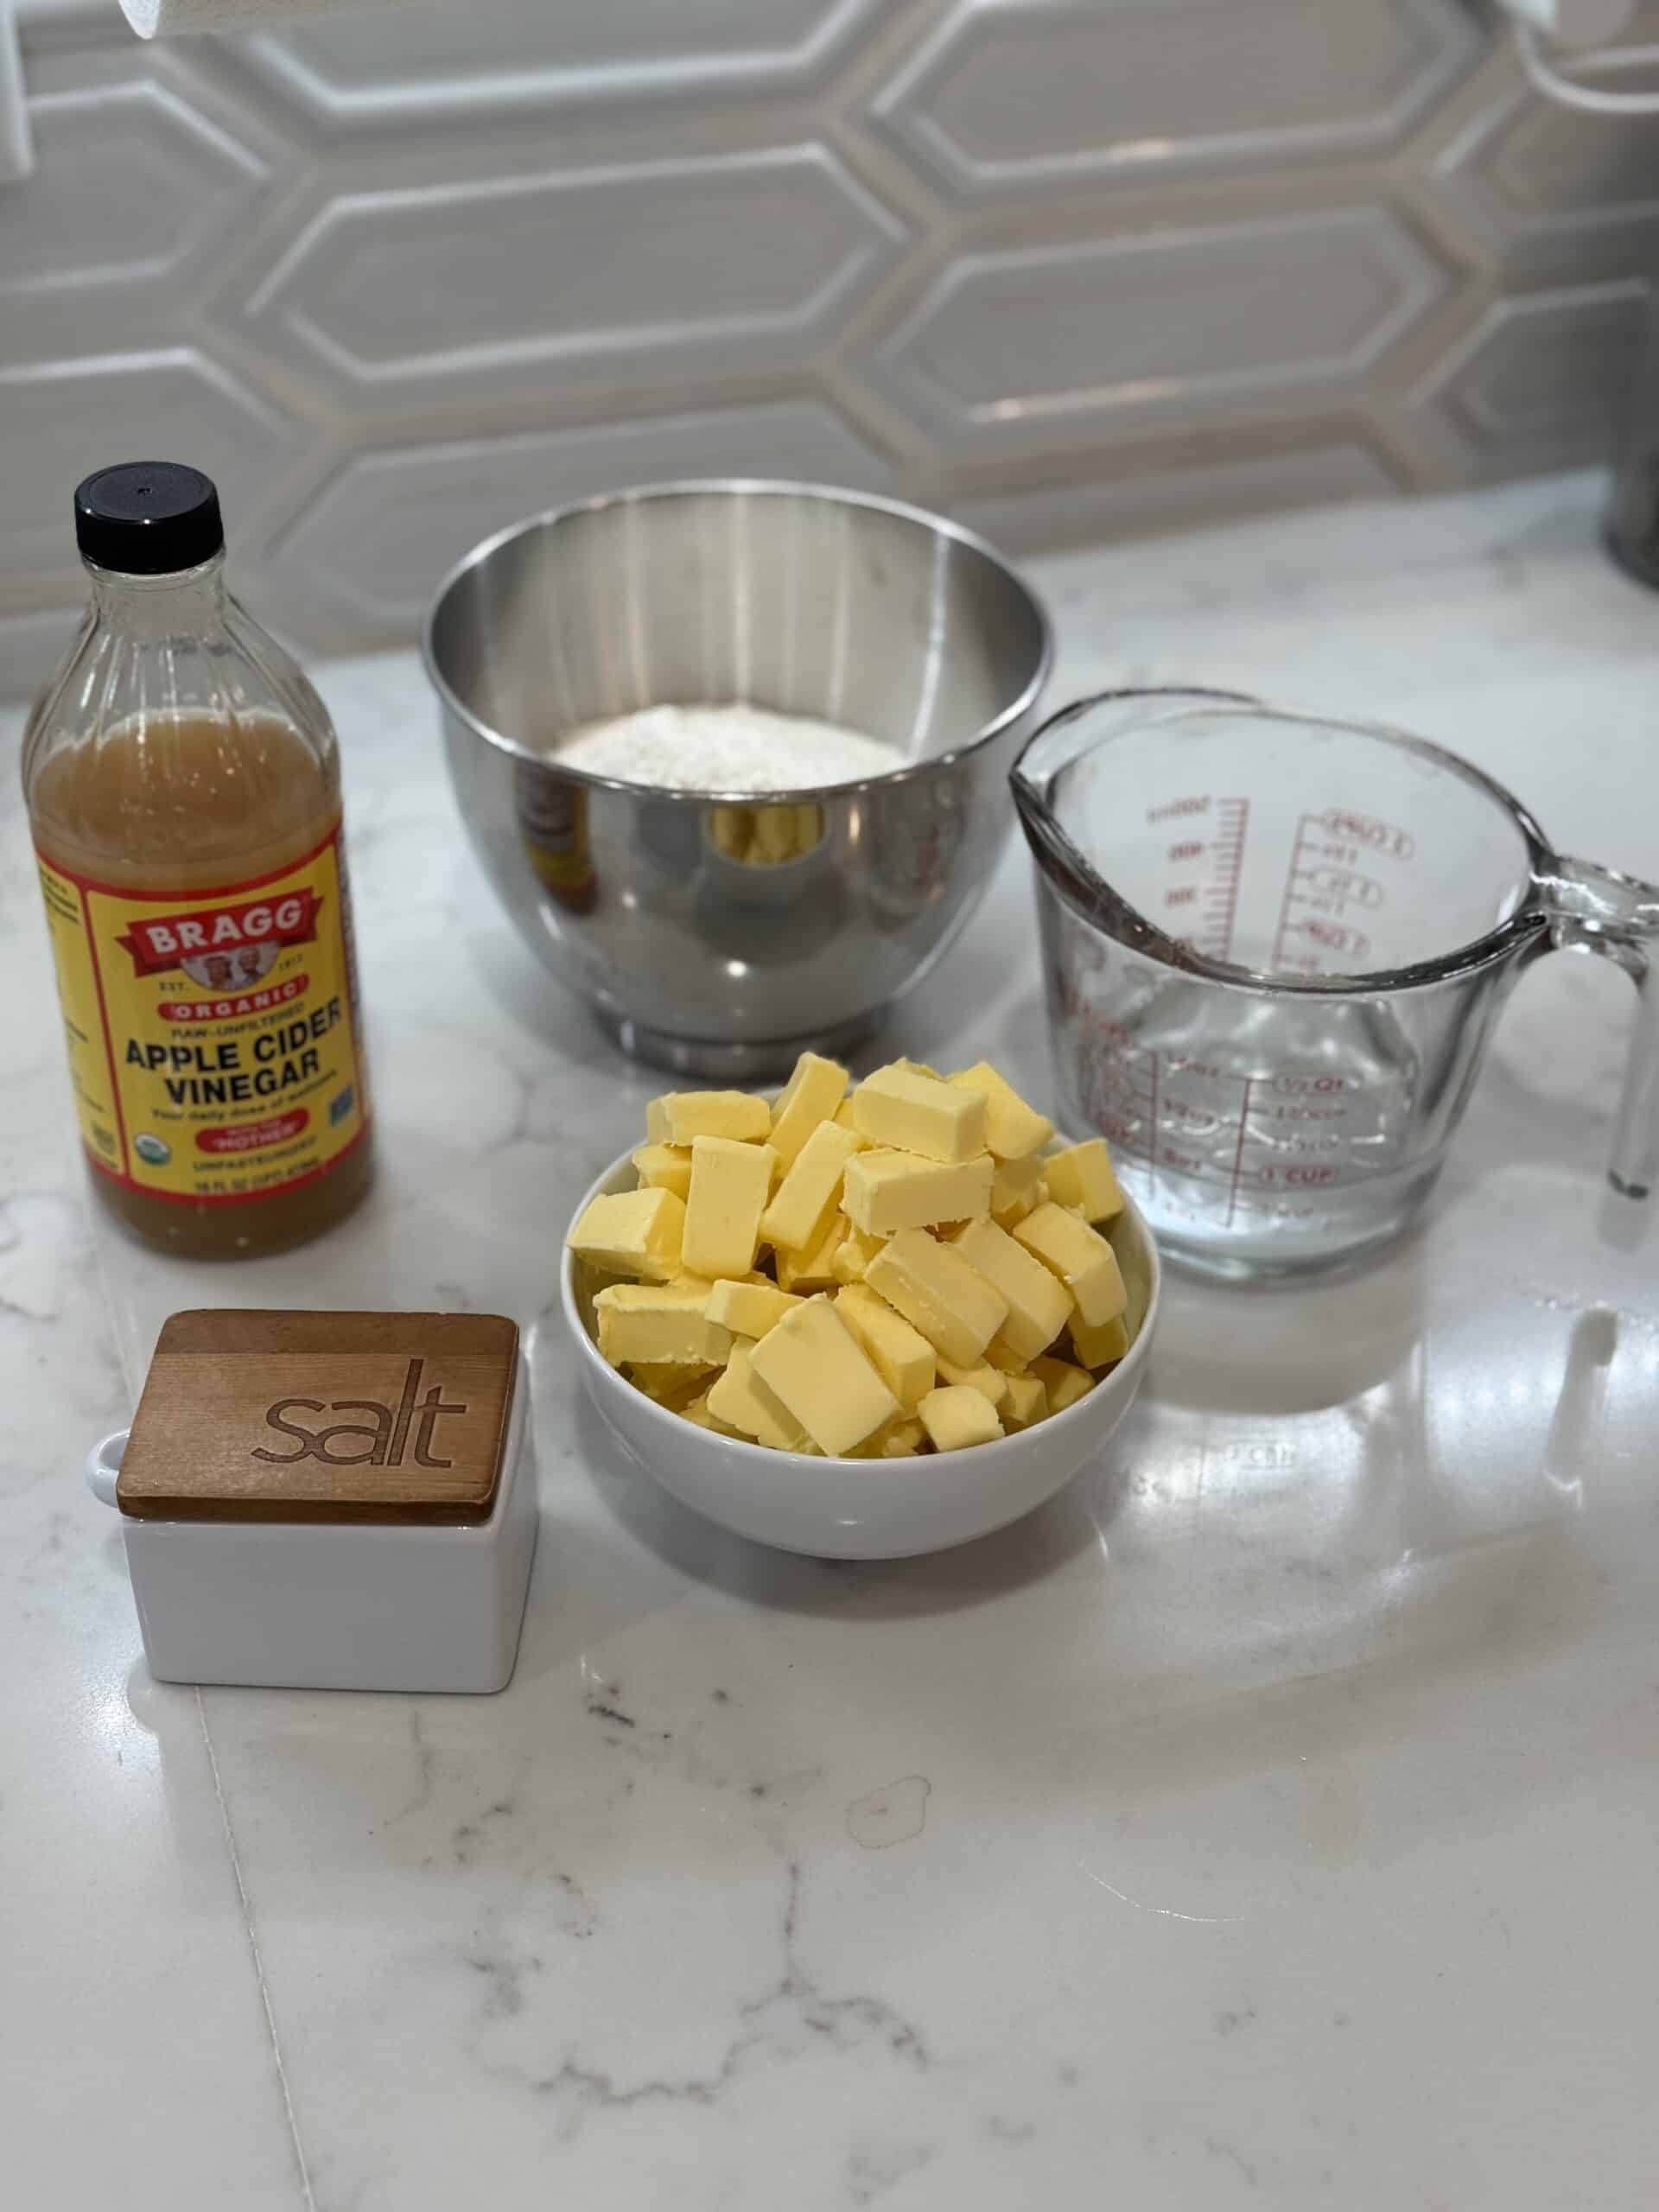
- Butter matters. Cold, salted butter adds flavor and structure. As it melts, it releases steam, creating the delicate, flaky layers every good pie deserves.
- Apple cider vinegar keeps it tender. Just a touch of acid limits gluten development, preventing the crust from becoming tough.
- Proper chilling is key. Resting time allows the flour to hydrate and gluten to relax, keeping your crust from shrinking during baking.
Quick Summary of the Method
Combine flour and salt, then pulse with cold butter until crumbly. Add ice water and vinegar just until the dough holds together. Shape it into two disks, chill, and roll out when ready to bake. For custard pies like this, you can bake the crust unbaked (as directed here) or partially blind bake if you prefer extra crispness.
That's it. Simple ingredients, smart technique, and a dough that's as tender as the memories tied to it. For a step-by-step guide on making the best pie crust, head over to my tried and true recipe: The Best Easy Pie Crust Recipe (Flaky & Foolproof).
Combined, this makes an easy flaky pie crust pumpkin pie recipe your family will crave every Thanksgiving!
Expert Crust Chemistry Tip
Cold butter isn't just about texture, it's chemistry. When butter stays solid until it hits the oven, the water inside it turns to steam, lifting the dough and forming flaky layers. If the butter softens too early, it blends with the flour and creates a uniform dough instead of laminated sheets, giving you a dense, tough crust. Keep everything cold, even your flour, bowl, and rolling pin. This helps to preserve that delicate butter-fat structure and achieve bakery-level flake.

How to Make From Scratch
Before you start, take a deep breath. You don't need fancy tools or special training-just patience, confidence, and a little time. This is the kind of bake that invites you to slow down, enjoy the process, and savor the reward.
Step 1: Preheat
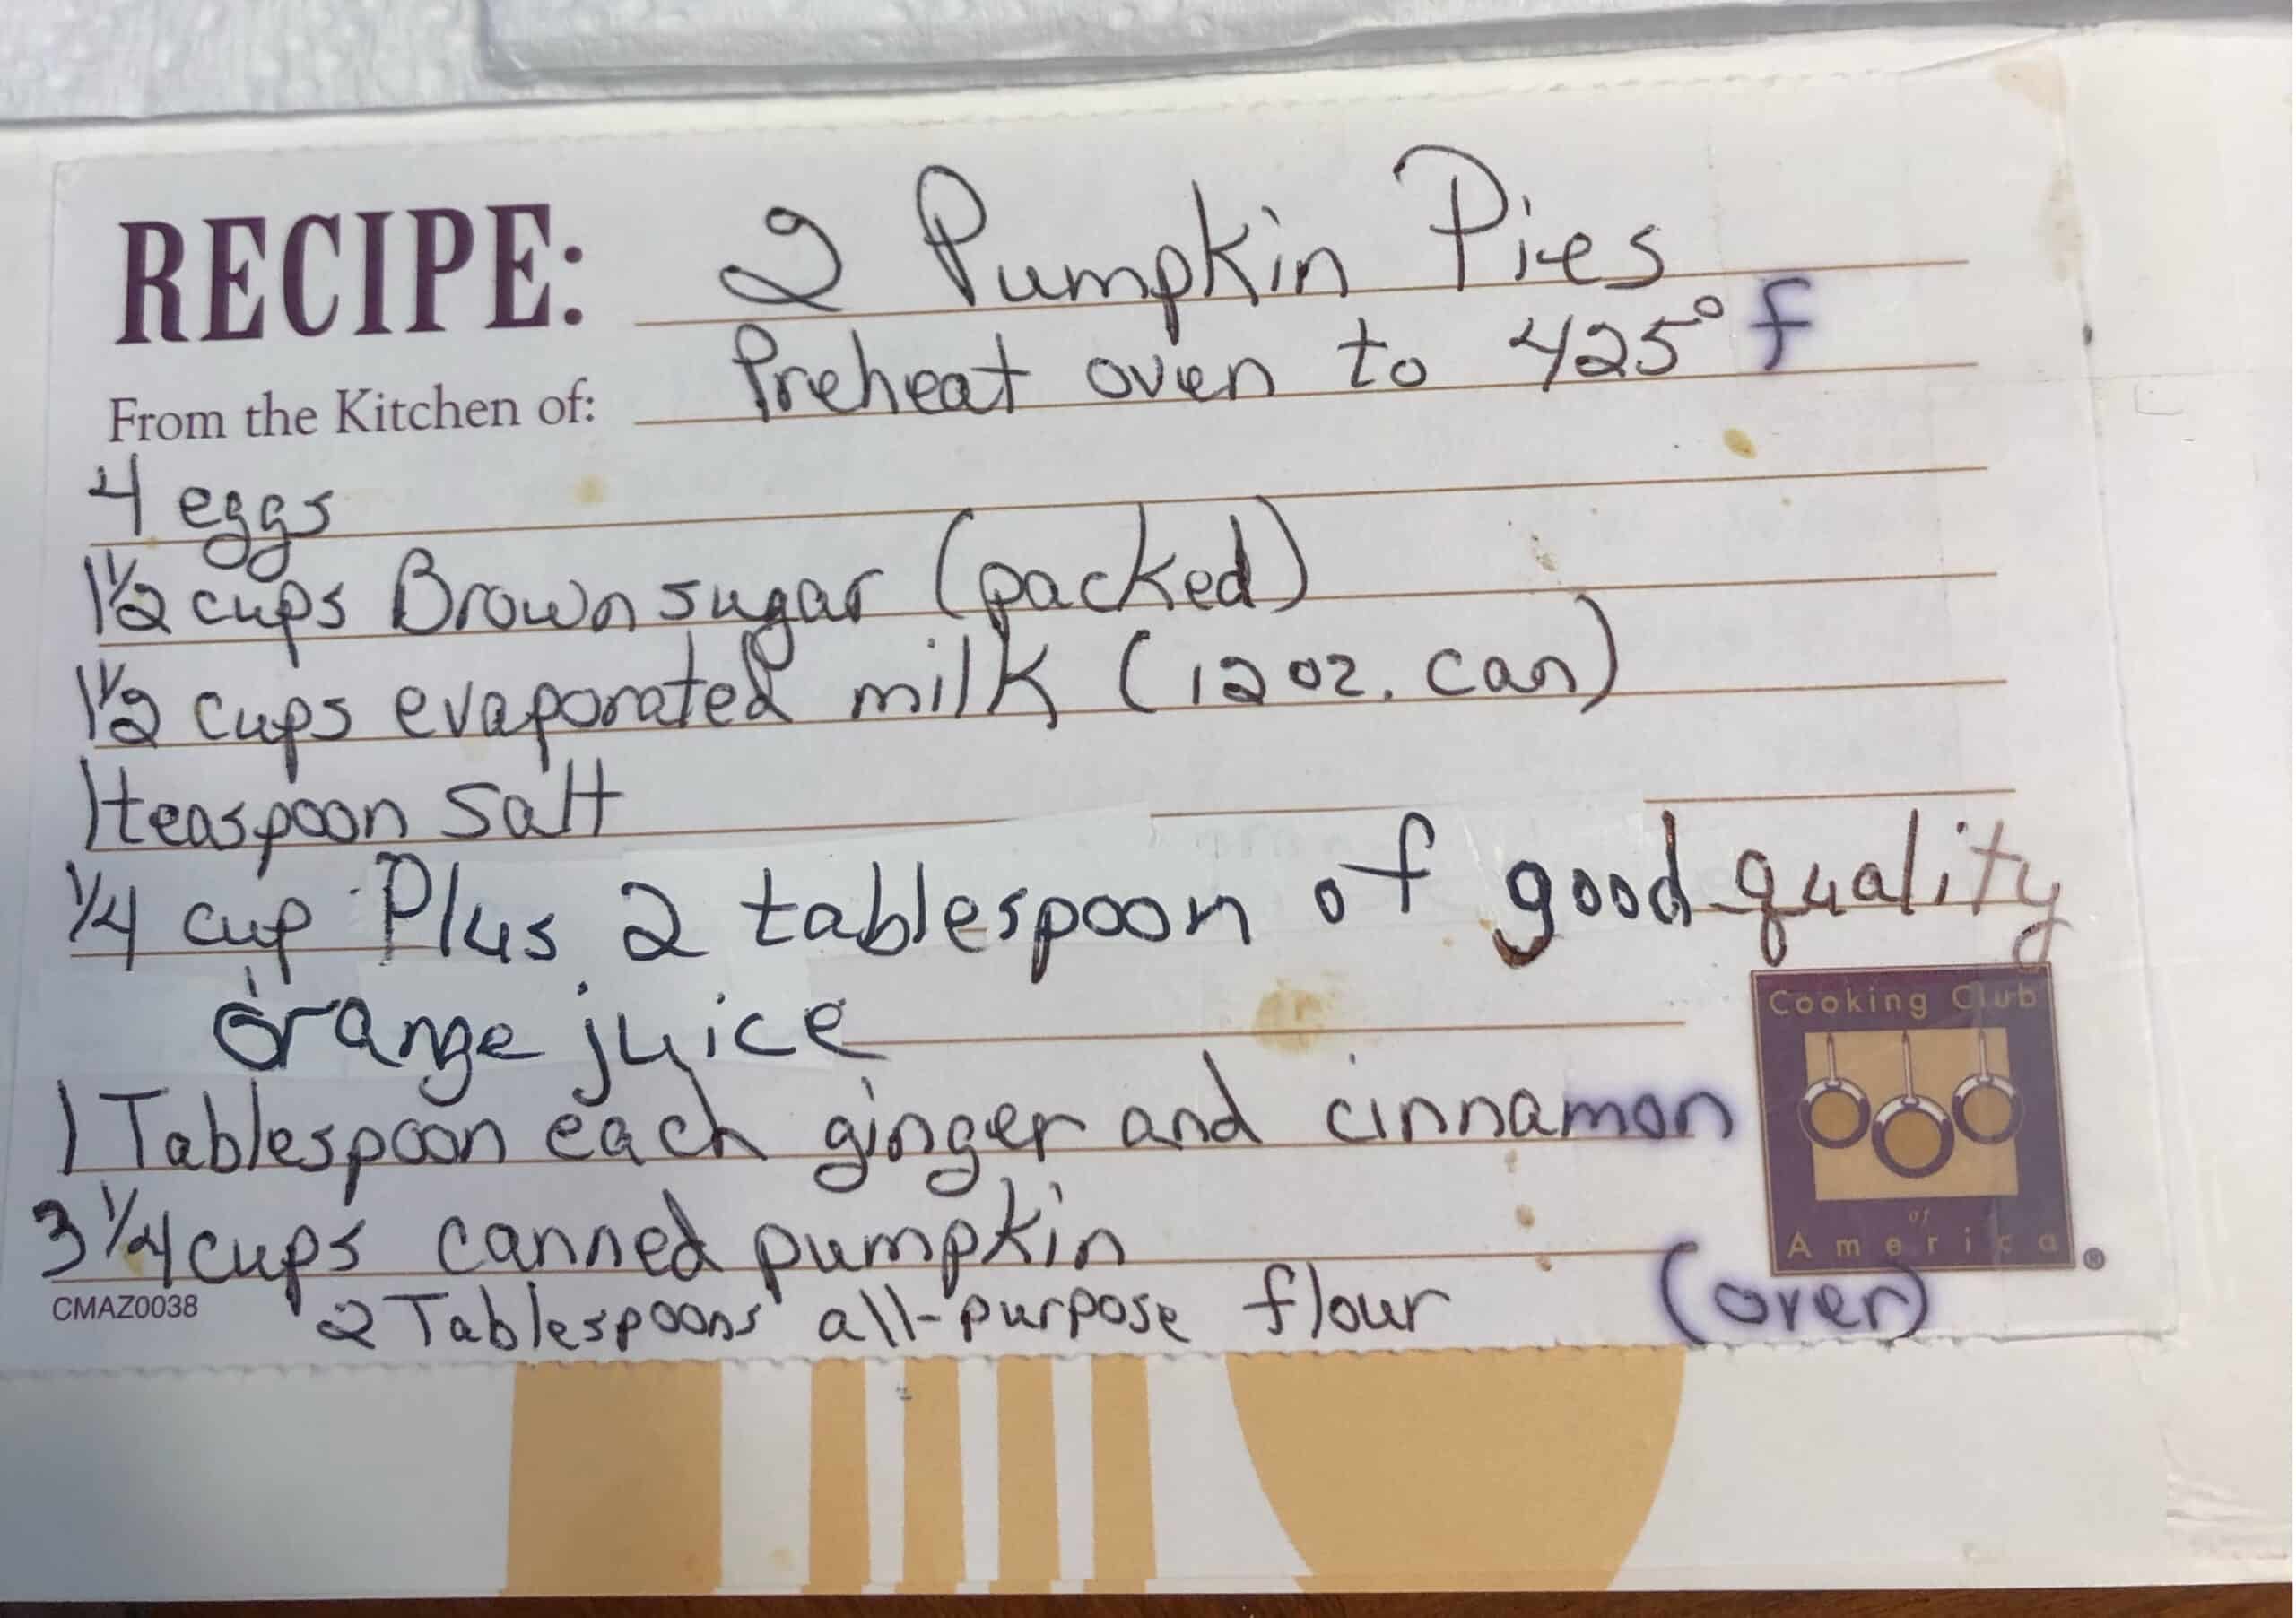
Preheat oven temperature to 425°F (220°C).
Step 2: Mix the Filling
In a large bowl, lightly beat the eggs. Add brown sugar, salt, ginger, and cinnamon. Stir in pumpkin puree, orange juice, and flour until smooth. Gradually add evaporated milk, whisking gently after each addition until fully blended.
Step 3: Fill the Crusts
Pour filling into two unbaked 9-inch pie shells, leaving a bit of space at the top.
Step 4: Bake
Bake at 425°F for 15 minutes, then reduce temperature to 350°F (175°C) and bake for 40-50 minutes, or until set.
Step 5: Check for Doneness
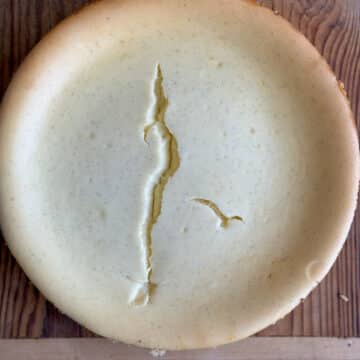
The edges should be firm while the center jiggles slightly when moved. A knife inserted near the center should come out mostly clean.
Step 6: Cool and Serve
Cool on wire racks completely before serving. The resting time allows the custard to set perfectly for clean slices.
Serve with whipped cream, ice cream, or a drizzle of Homemade Caramel Sauce.
Expert Temperature Control Tip
Pumpkin pie is a custard, and custards are all about precision. Egg proteins start to coagulate around 160°F, but the sweet spot for a silky, sliceable pie is 175°F (80°C) in the center. At this temperature, the proteins have thickened just enough to hold the filling's structure without squeezing out moisture. Anything higher and you risk over-coagulation; that's when cracks form and the texture turns grainy. An instant-read thermometer removes the guesswork and gives you professional consistency every time.

Tips, Tools, and Baking Science
Every pumpkin pie tells a story in flavor, but behind every great pie is a foundation of solid baking science. When you understand why each step matters, you can bake with confidence instead of guesswork. These tools and techniques help ensure your pie turns out as beautifully as it tastes; flaky crust, silky filling, and no cracks in sight.
Tools You'll Need
- Mixing bowls and whisk (or a stand mixer like a KitchenAid); gentle mixing keeps the custard smooth without overworking the eggs.
- 9-inch pie dishes: Glass or ceramic distribute heat evenly and help you see when the crust is golden underneath.
- Cooling racks: Essential for even airflow during the cooling process.
- Instant-read thermometer: For precision. The center of your pie should reach around 175°F (80°C)-the sweet spot for custard set without curdling.
- Aluminum foil or pie shield: Prevents overbrowning of crust edges during long bakes.
Expert Tips & Baking Science
For the smoothest, restaurant-quality pumpkin pie texture, allow your filling to rest for 10-15 minutes before baking.This short rest lets air bubbles rise and dissipate, preventing surface cracks and ensuring a dense, creamy custard. It also allows the starches in the pumpkin and flour to hydrate more fully, improving structure and sliceability. Think of it as letting the custard "settle" before it sets. A small detail that makes a professional-level difference. Here are some other tips I've learned from decades of making this pumpkin pie with my mom and now daughters.
- Cold butter = flaky layers. Keeping your butter solid until it hits the oven ensures steam pockets form in the crust, creating that tender flake. Warm butter melts too soon, leading to a dense base.
- The high-then-low bake is key. Starting at 425°F activates crust browning quickly, while lowering to 350°F allows the custard to cook evenly without scrambling the eggs.
- Temperature control matters. Overheating the filling before baking or overbaking in the oven can curdle the custard. The ideal set is gentle and slow.
- Resting is part of baking. Custards continue to cook internally after being removed from the oven. Let the pie cool completely to stabilize proteins and firm up the texture.
- Moisture management. Evaporated milk contains less water than cream or whole milk, keeping the filling rich and thick without leaking into the crust.
Troubleshooting Common Pumpkin Pie Issues
- Cracked Top: Overbaked or cooled too quickly. The proteins over-tightened. Pull it when it's slightly wobbly in the center.
- Soggy Bottom: Underbaked crust or too much liquid. Blind bake for 10 minutes, and don't overfill the shell.
- Weeping (watery layer): Steam trapped under the custard. Bake on the middle rack and let it cool slowly to release moisture.
- Dull Flavor: Old spices lose potency quickly. Replace your spices every 6 months or make your own Pumpkin Pie Spice Recipe for vibrant flavor.
- Shrinking Crust: Dough wasn't rested long enough. Allow at least 1 hour of chilling before rolling out.
Each of these tips connects to simple food science: heat, fat, moisture, and time. Once you understand how they interact, you can troubleshoot confidently and bake pies that turn out perfectly every time.
Variations, Make Ahead, and Storage
Pumpkin pie might be a Thanksgiving staple, but it's versatile enough for every season. Whether you're prepping ahead for the holiday, serving guests with different preferences, or freezing leftovers for later, this recipe adapts beautifully when you understand the why behind the techniques.
Flavor Variations
- Maple Pumpkin Pie: Replace 2 tablespoons of brown sugar with pure maple syrup. The natural invert sugars create a silkier texture and deeper caramel notes.
- Brown Butter Pumpkin Pie: Brown the butter before mixing it into the filling. The Maillard reaction adds nutty complexity.
- Ginger or Gingersnap Crust: Mix 1 teaspoon of ground ginger into your pie crust or use crushed gingersnaps for a spiced variation that complements the filling.
- Mini Pumpkin Pies: Divide filling into muffin tins lined with pie dough. Bake 10-12 minutes shorter for handheld versions.
Make Ahead
Pumpkin pie is one of the best make-ahead desserts because the flavors actually improve with time. As the pie cools and rests, the spice compounds bloom, deepening the overall taste.
- 1-2 Days Ahead: Bake completely, cool, cover with foil, and refrigerate. Bring to room temperature before serving.
- Blind Bake in Advance: Prepare and parbake crusts up to 24 hours ahead. Cool, cover, and fill when ready.
- Freezer Option: Cool baked pies completely. Wrap in plastic, then foil, pressing out any air. Freeze for up to 2 months. Thaw overnight in the fridge to preserve texture and prevent condensation.
Storage
- Refrigerate: Because it's custard-based, pumpkin pie must be refrigerated after cooling. Store covered for up to 4 days.
- Reheat: Warm individual slices at 300°F for 10-12 minutes or enjoy chilled.
- Avoid Freezing Raw Filling: The liquid custard separates when thawed. Always freeze pies after baking and cooling fully.
By understanding how fats, starches, and proteins respond to time and temperature, you can plan ahead without sacrificing texture or flavor. Whether you're baking for Thanksgiving or a quiet fall evening, these make-ahead strategies ensure your pie tastes just as fresh as the day it came out of the oven.
Recipe FAQs
Whisk together eggs, sugar, spices, and pumpkin puree. Add orange juice, flour, and evaporated milk. Pour into pie shells, bake hot for 15 minutes, then lower the temperature to finish gently.
Yes. Cool completely before wrapping in plastic and foil. Freeze up to 2 months, thaw overnight in the refrigerator.
Yes. Because it's custard-based, it must be refrigerated after cooling. Store for up to 4 days.
Typically cinnamon, ginger, nutmeg, and cloves. Some blends add allspice or cardamom for warmth.
The edges should be firm and the center should jiggle slightly. A knife inserted near the center should come out mostly clean.
It baked too long or cooled too quickly. Always remove it when slightly jiggly and let it cool slowly at room temperature.
Blind bake for 10 minutes and bake the pie on a preheated baking sheet. Blind baking means partially baking the empty crust before adding your filling. This process firms up the bottom layer, seals the butter into thin, flaky sheets, and prevents the custard from soaking into the dough.
To blind bake, line the chilled crust with parchment paper, fill it with pie weights or dried beans, and bake at 375°F for 15-20 minutes until the edges just start to turn golden. Remove the weights and bake another 5 minutes. The crust should look dry and lightly set before adding the pumpkin filling. Baking the pie on a preheated baking sheet helps conduct heat directly into the bottom of the pan, ensuring a crisp, sturdy base.
Resting lets the custard finish setting and the spices bloom as the pie cools, enriching flavor.
Traditional pumpkin pies are not gluten free because the crust is made with wheat flour, which contains gluten. However, you can easily make a gluten free version by using a 1:1 gluten free flour blend in your crust or using a pre-made gluten free crust. The pumpkin filling itself is naturally gluten free-it's a custard made from eggs, sugar, pumpkin puree, and milk. The key is ensuring that your crust and all ingredients are certified gluten free to prevent cross-contamination.
Yes-technically! Most canned "pumpkin" puree is made from varieties of sweet winter squash, such as Dickinson or Butternut, which are part of the same botanical family as pumpkins. These varieties are used because they have denser flesh, smoother texture, and a naturally sweeter flavor than carving pumpkins. So while your pie is called "pumpkin pie," it's really made from a specially bred squash that delivers that classic rich, earthy flavor we all love.
Yes! Pumpkin pie should have a gentle jiggle when it's done baking-similar to the movement of set gelatin or a soft wobble in the center when you nudge the pan. This means the custard is fully cooked around the edges but still slightly fluid in the center. As the pie cools, residual heat continues to cook the middle through a process called carryover baking, creating a smooth, creamy texture without cracks. If the center looks completely firm in the oven, it's likely overbaked and will turn dry or split on top.
Recipe

Easy Classic Pumpkin Pie Recipe
Equipment
- 2 (9-inch) pie dishes
- 1 stand mixer with paddle attachment or mixing bowls and whisk. Gentle mixing keeps the custard smooth without overworking the eggs.
- Measuring Cups and Spoons
- 1 Spatula or Wooden Spoon
- 1 Fine Mesh Strainer optional, for an extra-smooth custard
- 2 Cooling racks
- Aluminum foil or pie shield to prevent crust edges from over browning
- 2 Baking Sheet preheated, to crisp the bottom crust and catch drips
- Digital Thermometer optional, for testing custard doneness - target 175°F/80°C in the center
Ingredients
- 2 unbaked 9-inch pie crusts Homemade is best. See The Best Easy Pie Crust Recipe (Flaky & Foolproof), but store-bought works too.
- 4 large eggs Lightly beaten; provides structure for the custard.
- 1½ cups brown sugar Packed. Adds depth and caramel sweetness.
- 1½ cups evaporated milk 12 oz can, creates a rich, creamy filling.
- 1 teaspoon salt Balances sweetness and enhances flavor.
- ¼ cup plus 2 tablespoons, orange juice Adds brightness and subtle acidity.
- 1 tablespoon ground ginger Adds warmth and spice.
- 1 tablespoon ground cinnamon Brings sweetness and aromatic balance.
- 3¾ cups canned pumpkin puree Use Libby's 100% Pure Pumpkin for best texture and flavor.
- 2 tablespoons all-purpose flour Helps thicken the filling for clean slices.
- Optional Whipped cream or caramel sauce, for serving
Instructions
Preheat the oven.
- Preheat oven to 425°F (220°C). Place a baking sheet inside to preheat - this helps crisp the bottom crust and ensure even baking.
Prepare your pie crusts.
- Use two unbaked 9-inch pie crusts. Homemade is always best (see The Best Easy Pie Crust Recipe (Flaky & Foolproof)), but a quality store-bought crust works if you're short on time.2 unbaked 9-inch pie crusts
Mix the wet ingredients.
- In a large mixing bowl or stand mixer, lightly beat the eggs. Add brown sugar, salt, ginger, and cinnamon. Mix until combined.4 large eggs, 1½ cups brown sugar, 1 teaspoon salt, 1 tablespoon ground ginger, 1 tablespoon ground cinnamon
Add pumpkin and flour.
- Stir in the canned pumpkin puree, orange juice, and flour. Mix until the texture is smooth and uniform.¼ cup plus 2 tablespoons, orange juice, 3¾ cups canned pumpkin puree, 2 tablespoons all-purpose flour
Incorporate the milk.
- Gradually pour in the evaporated milk, whisking gently after each addition. The mixture should be creamy and slightly pourable, with no lumps.1½ cups evaporated milk
Fill the crusts.
- Pour the pumpkin filling evenly into both pie crusts, leaving about ¼ inch of space at the top.
Bake hot, then low.
- Place the pies on the preheated baking sheet. Bake at 425°F for 15 minutes, then reduce the oven temperature to 350°F (175°C). Continue baking for 40-50 minutes, or until the filling is mostly set.
Check for doneness.
- The edges should be firm, and the center should jiggle slightly when you move the pan. An instant-read thermometer should register about 175°F (80°C) in the center.
Cool completely.
- Transfer pies to a cooling rack and cool at room temperature for at least 2 hours. This resting period allows the custard to finish setting and prevents cracking.
Serve and enjoy.
- Slice and serve at room temperature or chilled. Top with whipped cream or drizzle with Homemade Caramel Sauce for a decadent finish.Optional Whipped cream or caramel sauce, for serving
Notes
- Homemade makes the difference. For the best texture and flavor, use a homemade crust like The Best Easy Pie Crust Recipe (Flaky & Foolproof). The buttery layers and tender crumb perfectly complement the creamy custard filling.
- Use quality pumpkin puree. Libby's 100% Pure Pumpkin offers the best consistency for smooth, sliceable filling. Fresh pumpkin can be unpredictable in water content, which can affect texture.
- What is in pumpkin pie spice? The gentle heat of ginger and the sweetness of cinnamon elevate the pumpkin's natural flavor into something rich, fragrant, and unforgettable. The blend of pumpkin pie with pumpkin pie spice creates that balanced warmth that transforms this traditional pie into something restaurant worthy.
- Watch the bake, not the clock. The pie is ready when the center gently jiggles and the internal temperature reaches about 175°F (80°C). Every oven bakes differently, so go by texture and visual cues for perfect results.
- Cooling is key. Allow the pie to cool completely before slicing. Custards finish cooking as they cool, which prevents cracks and keeps the texture smooth and creamy.
- Make it ahead. This pie can be baked 1-2 days before serving. Cover and refrigerate after cooling - the spices deepen and the flavor improves with time.
- Keep your butter cold for the flakiest crust. When butter stays solid until baking, it releases steam that forms light, layered pastry.
- Temperature control matters. Pull the pie once the center reaches 175°F; higher heat overcoagulates the eggs and can cause cracking.
- Faith in the small things. Baking traditions like this are a reminder of gratitude - for the hands that taught us, the family we share it with, and the grace that fills our tables.
Nutrition
A Thanksgiving Reflection on Gratitude
Every Thanksgiving, when the pies come out of the oven, I pause for a moment. The kitchen is warm, the air is filled with cinnamon, and my family gathers close. It's a picture of grace; undeserved, yet freely given.
We give thanks for family, for the joy of baking together, and for the salvation we have in Christ. Because even in something as simple as a homemade pie, there's a reminder of His goodness, provision, and love.
What to Bake Next
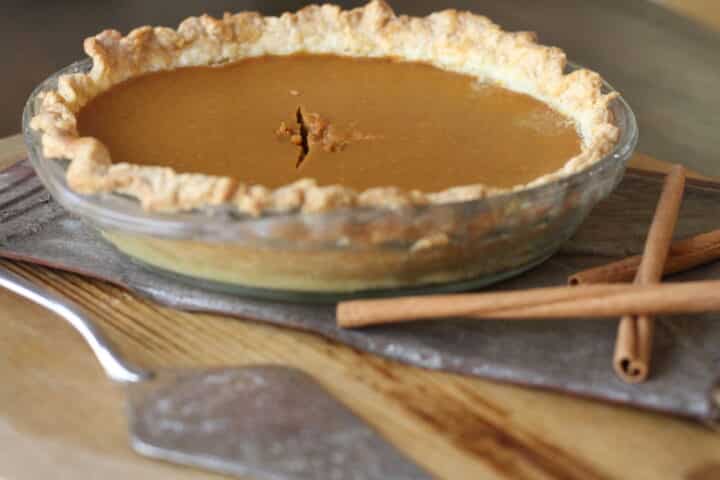
This easy classic pumpkin pie recipe has been passed down and perfected through generations. With a silky, spiced pumpkin filling and buttery homemade crust, it's a Thanksgiving tradition worth keeping. Simple to make, rich in flavor, and filled with gratitude. This is the kind of pie that brings family together and reminds us why we bake.
If you loved this Easy Classic Pumpkin Pie Recipe, which I think is THE November Thanksgiving dessert, you'll love these other fall favorites:
- The Best Easy Pie Crust Recipe (Flaky & Foolproof): Buttery, reliable, and perfect for any filling.
- Caramel Sauce Recipe: The perfect drizzle for any fall dessert.
- Spiced Pumpkin Cheesecake: A rich, creamy twist on a holiday classic.
- Easy Homemade Apple Crisp: A cozy, crowd-pleasing dessert that pairs perfectly with vanilla ice cream.
- 12 Favorite Fall Recipes: Our collection of cozy, faith-filled seasonal bakes.
Each of these recipes builds on the same promise: real ingredients, real connection, and really good baking. With all this talk of the best pumpkin pie pumpkin pie recipe, I'm off to Starbucks for a Pumpkin Spiced Latte; or maybe I'll start making a pumpkin pie latte recipe. 🙂
If you are looking for easy, no-bake options, I have you covered there too. My No Bake Oatmeal Cookie Recipe is my favorite no bake cookie recipe, ever!
👩🏻🍳 Follow Us!
About Kendra Boettner
Hi, I'm Kendra, wife, mom of three, and the baker behind The Baker's Table. After 20+ years baking at home, including time working in professional kitchens, these are some of my favorite recipes I've learned along the way.
🧁 Want to see more? Join me on Instagram, Facebook, and Pinterest
1️⃣ My 'The Best No Bake Oatmeal Cookie" was my #1 recipe in 2025! Easy and kid friendly!
📋 Here are Kendra's favorite recipes
🍪 Or start with some of our readers' favorites:
- The Best Easy Pie Crust Recipe (Flaky and Foolproof)
- The Best Homemade Brownies (Chewy, Fudgy!)
- Lemon Meringue Bars with Swiss Meringue
- Cake Pucks Made Easy (Cake Pops without the Sticks)
- No-Bake Chocolate Mousse Pie with Oreo Crust
📋 Browse all of my recipes
🔗 The Baker's Table is Featured in:
🔗 Visit the About Me page to learn more about Kendra, Eric, and The Baker's Table!

Comments
No Comments