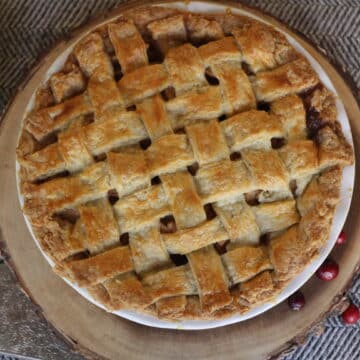
This apple pie recipe combines crisp granny smith apples, a buttery double crust, and a thick, glossy filling that bakes up golden and fragrant. Every bite is balanced; tart fruit, warm spice, and flaky pastry. It is simple enough for beginners yet refined enough to look straight out of a bakery case. When you bake this at home, your kitchen will smell like fall itself. Prep Time: 25 minutes | Bake Time: 45-60 minutes | Total Time: About 1 hour 25 minutes | Yield: 2 nine-inch pies

A Classic Made From Scratch, Just Like the Bakery but Better
When I think of apple pie, I picture my childhood kitchen filled with laughter, cinnamon, and the sound of peeling apples hitting the counter. My mom, my sisters, and I made pies together every autumn. We'd compete to see who could peel the longest ribbon without breaking it, and the whole room smelled like sugar and spice.
Now my daughters and I do the same. We talk about our day while we slice apples and roll out dough. These are the moments that make baking from scratch so much more than a recipe. Baking connects generations. It reminds us that love can be measured in cups and shared around the table.
This is the apple pie recipe I learned from my mom and still make today. It is forgiving, reliable, and full of warmth. I have an easy pumpkin pie recipe that also was passed down from my mom, that is another family favorite in my household!
For the best flaky base, use our All-Butter Pie Crust Recipe. It is the crust I trust for every pie I bake.)
Jump to:
- A Classic Made From Scratch, Just Like the Bakery but Better
- Why You'll Love This
- Ingredients You Need & Why
- Making the Perfect Crust
- Easy Instruction Guide
- Tips, Tools, and Troubleshooting
- Variations, Substitutions, and Storage
- Recipe FAQs
- Recipe
- Perfect Apple Pie Recipe with Homemade Filling
- What to Bake Next
- If You Loved This, Try These!
- Comments
Why You'll Love This
There are few desserts more comforting or confidence-boosting than a classic apple pie. This recipe is straightforward but never plain. It teaches you the rhythm and science behind baking a truly beautiful pie.
- Bakery-quality texture: Crisp crust with tender crumb and a rich apple pie filling that holds its shape.
- Balanced flavor: Tart granny smith apples blended with cinnamon and allspice.
- Made from scratch: No shortcuts, no mixes, just real ingredients that work every time.
- Tested and true: Generations of family baking experience turned into step-by-step guidance.
- Beautiful presentation: Golden tops, glossy filling, and slices that serve cleanly.
Make sure to check out my Top 12 Favorite Fall Recipes for a collection of my favorite fall and Thanksgiving recipes for even more inspiration.

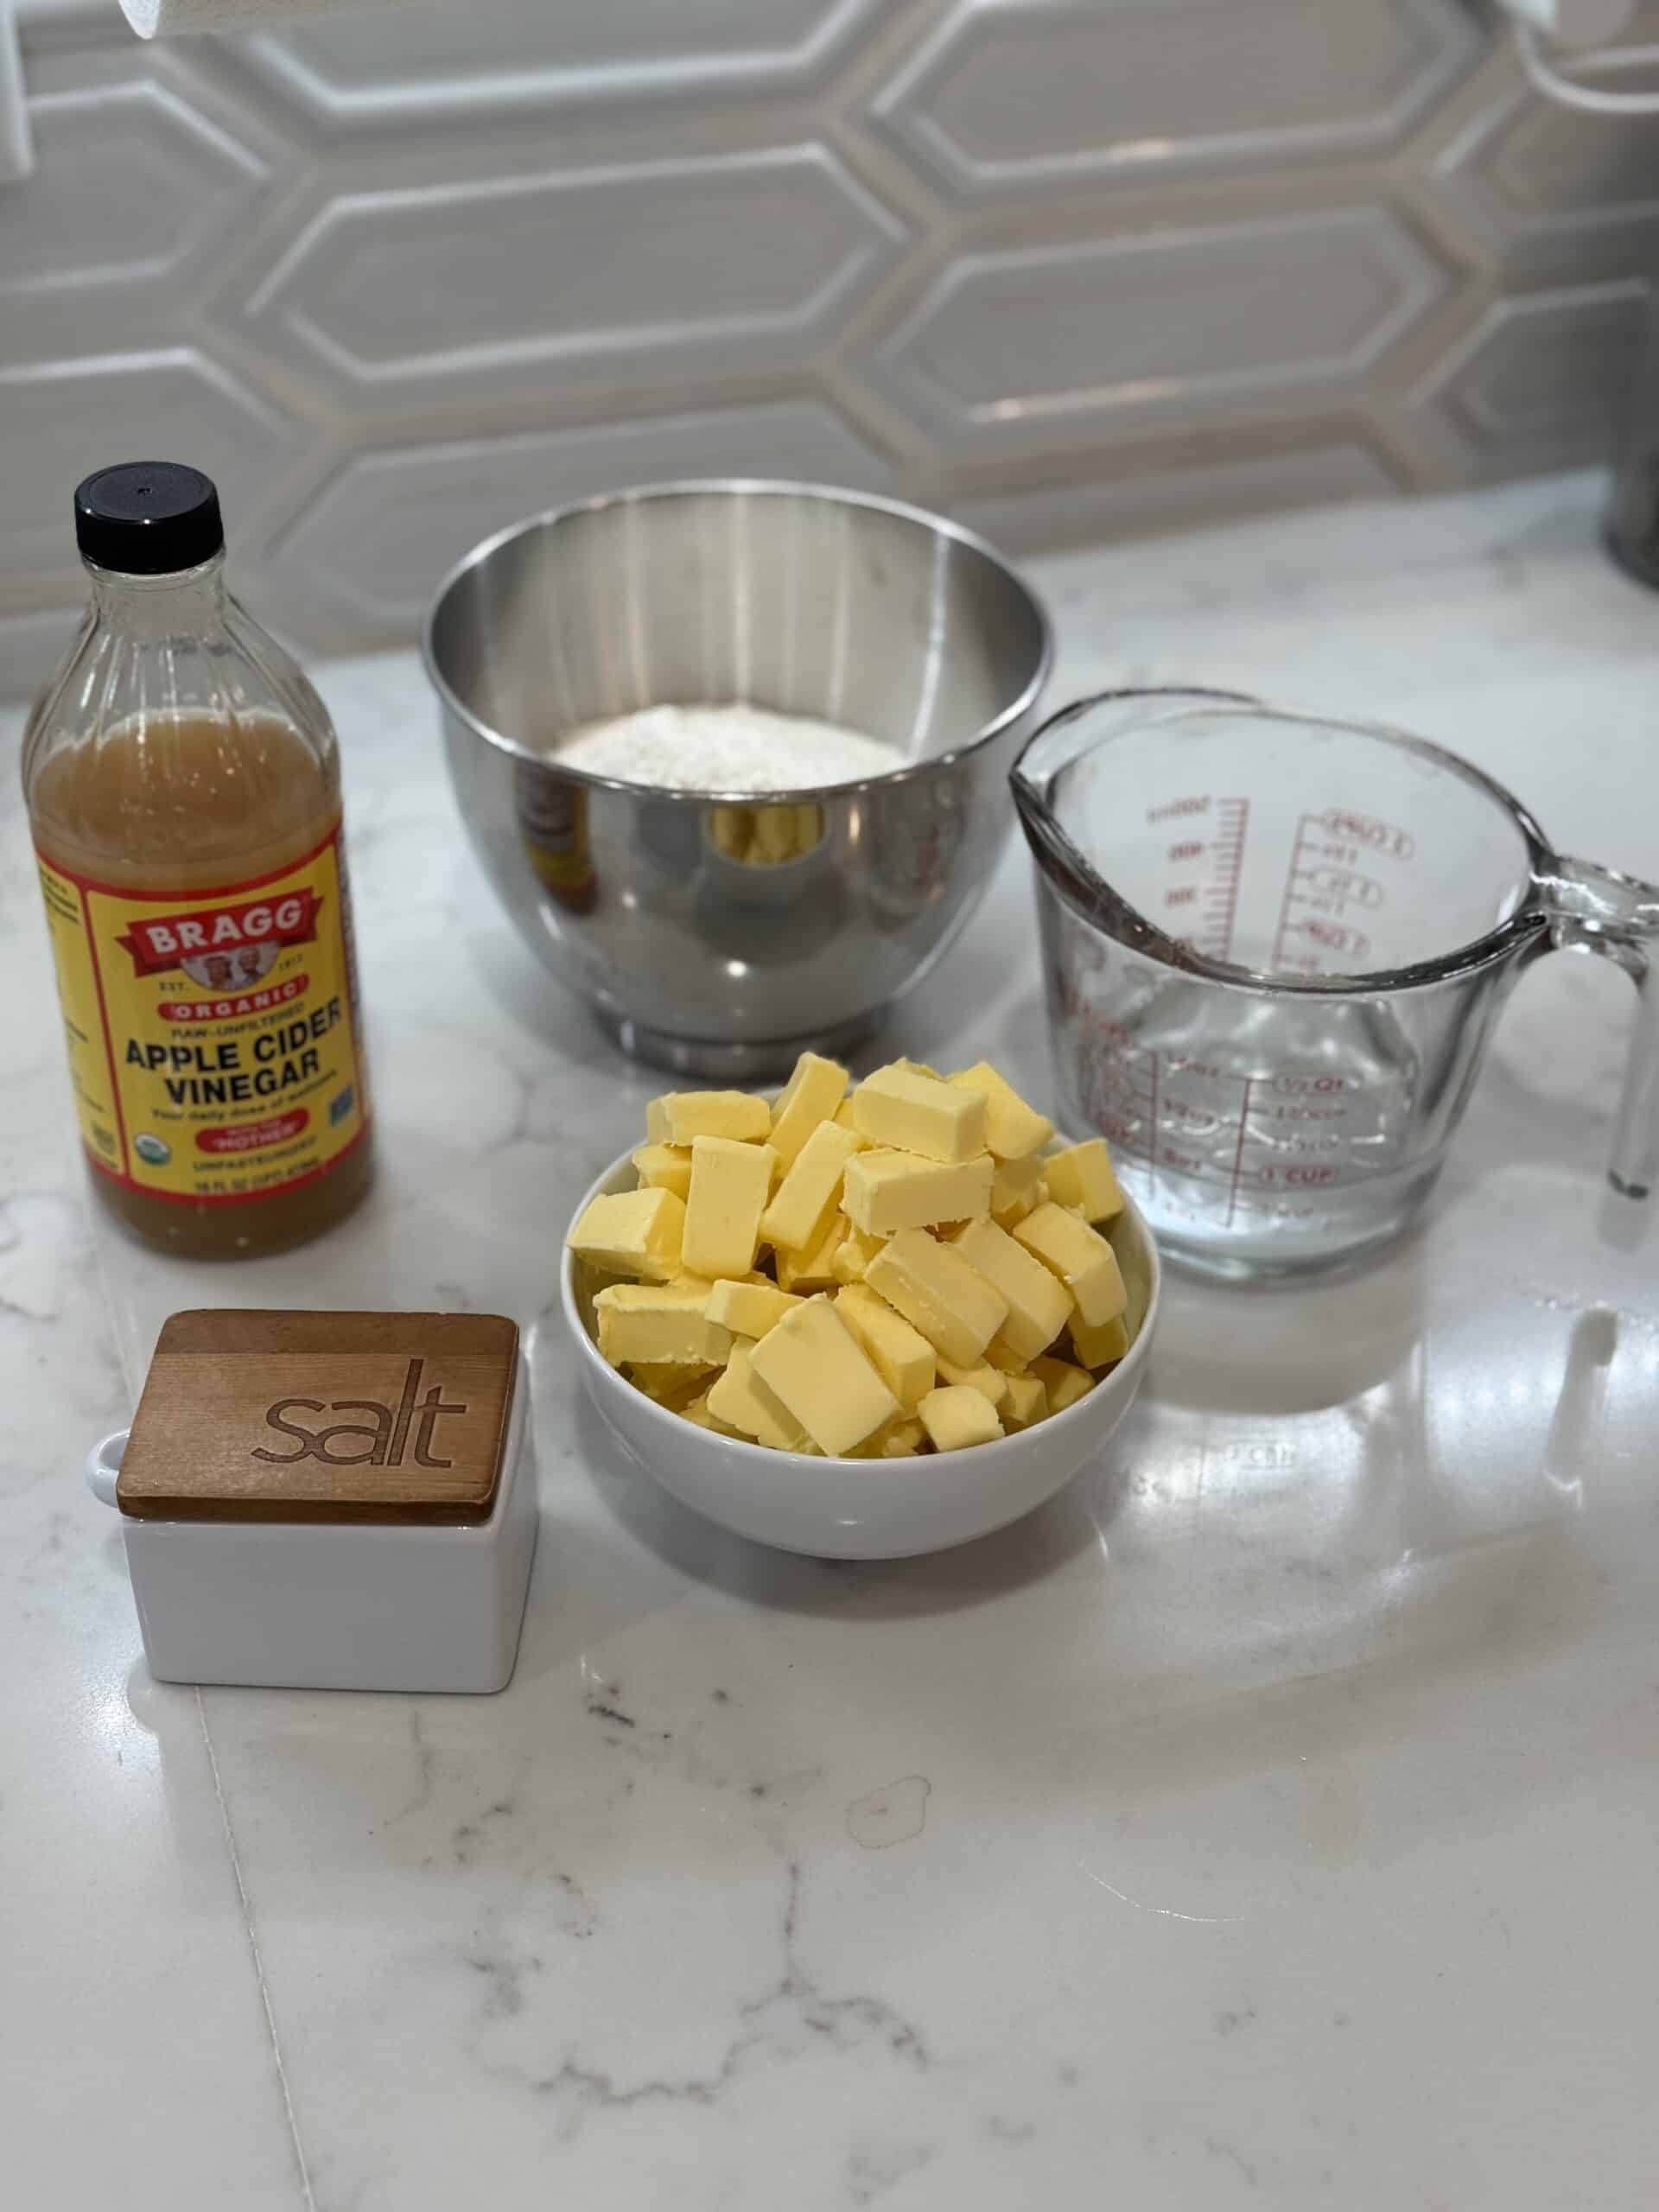
Ingredients You Need & Why
Understanding why each ingredient matters is what turns a simple pie into something extraordinary.
- Granny Smith Apples: The firm texture and tartness of granny smith apples keep the filling from turning mushy or overly sweet. Their natural pectin thickens the filling as it bakes, giving body and shine.
- Sugar: Sugar draws moisture from the apples through osmosis. Those juices combine with flour to form a syrup that caramelizes in the oven.
- Flour: The starch in flour absorbs liquid and swells with heat. This turns free juice into a smooth, cohesive sauce that clings to every slice.
- Cinnamon and Allspice: Cinnamon adds warmth, while allspice layers in subtle notes of clove and nutmeg. Together they make the pie smell like a bakery.
Two things that really make this recipe standout. These are my not so secret "secrets" for an amazing pie. I always use salted butter. And homemade pie crust elevates any pie into a restaurant and bakery worthy dessert.
- Salted Butter: Always salted. Salt lifts every flavor and balances sweetness. Butter's moisture turns to steam as it melts, creating the flake in the crust. Personally, I think salted butter has a better butter flavor, really elevating the overall taste of the recipe.
- Pie Crust: Homemade is always best. Try my The Best Easy Pie Crust Recipe (Flaky & Foolproof). But store-bought works too if you're short on time. The butter in the crust creates tenderness, while cold handling ensures visible layers that bake into crisp, golden sheets of pastry.
Making the Perfect Crust
A great pumpkin pie starts with a great crust. For this recipe, I always use The Best Easy Pie Crust Recipe (Flaky & Foolproof); the same one my mom taught me to make years ago.
Here's why it's perfect for custard pies like this:
- Butter matters. Cold, salted butter adds flavor and structure. As it melts, it releases steam, creating the delicate, flaky layers every good pie deserves.
- Apple cider vinegar keeps it tender. Just a touch of acid limits gluten development, preventing the crust from becoming tough.
- Proper chilling is key. Resting time allows the flour to hydrate and gluten to relax, keeping your crust from shrinking during baking.
Quick Summary of the Method
Combine flour and salt, then pulse with cold butter until crumbly. Add ice water and vinegar just until the dough holds together. Shape it into two disks, chill, and roll out when ready to bake. For custard pies like this, you can bake the crust unbaked (as directed here) or partially blind bake if you prefer extra crispness.
That's it. Simple ingredients, smart technique, and a dough that's as tender as the memories tied to it. For a step-by-step guide on making the best pie crust, head over to my tried and true recipe: The Best Easy Pie Crust Recipe (Flaky & Foolproof).
Combined, this makes an easy flaky pie crust pumpkin pie recipe your family will crave every Thanksgiving!
Expert Crust Chemistry Tip
Cold butter isn't just about texture, it's chemistry. When butter stays solid until it hits the oven, the water inside it turns to steam, lifting the dough and forming flaky layers. If the butter softens too early, it blends with the flour and creates a uniform dough instead of laminated sheets, giving you a dense, tough crust. Keep everything cold, even your flour, bowl, and rolling pin. This helps to preserve that delicate butter-fat structure and achieve bakery-level flake.

Easy Instruction Guide
You only need one large bowl and a little patience to master this easy apple pie recipe.
- Mix sugar, flour, cinnamon, and allspice.
- Add sliced apples and toss gently until coated.
- Divide mixture between two bottom crusts.
- Dot each pie with butter.
- Cover with top crusts, seal, and cut small vents.
- Bake at 400°F for 45-60 minutes, until golden and bubbly.
- Cool completely before slicing so the filling can set.
Scroll down to the recipe card for full step by step guide. Here, I'll walk you through all the instructions so you can easily bake this amazing apple pie for any holiday.
The Science Behind the Bake
Let's pause for a second and talk about some of the science behind this recipe. When sugar meets apples, it pulls out liquid. That liquid mixes with flour, and as the heat rises, the starch granules swell, capturing moisture. The butter melts slowly, releasing steam that lifts and separates the crust layers.
All that to say, that cooling allows starches to firm up again so each slice stands tall. If you cut too soon, the filling will slide out before it has a chance to stabilize. Trust me, I have had to learn this the hard way, but it really does make a difference.

Tips, Tools, and Troubleshooting
Baking pie is as much about understanding textures and temperatures as it is about following steps. These small adjustments make all the difference between good and great results.
Tips & Techniques
- Keep ingredients cold: Cold butter and water preserve pockets of fat that melt during baking, producing the flaky pastry you love. Warm butter melts too early and leads to a dense, tough crust.
- Work the dough lightly: Overworking dough activates gluten and makes crust chewy. Handle it just until it comes together.
- Slice apples evenly: Uniform slices ensure the filling cooks consistently. Thin slices release more juice; thicker slices keep their shape.
- Toss gently: Overmixing can break apple fibers and draw out excess liquid, leaving the filling soupy.
- Chill before baking: Resting the assembled pie for 20 minutes relaxes gluten, helping the crust keep its shape and reducing shrinkage.
- Bake on a hot surface: Set the pie on a preheated sheet or baking steel. The quick heat transfer crisps the bottom crust and prevents sogginess.
- Check doneness visually: Watch for bubbles in the vents-this tells you the filling's starches have thickened and apples have softened.
Tools I Recommend
- Glass Pie Dish: Even browning and visibility of the crust.
- Pastry Blender: Helps incorporate butter quickly without melting it.
- Rolling Pin: Ensures even dough thickness for consistent baking.
- Pie Shield or Foil: Keeps edges from over-browning.
- Digital Thermometer: When the filling reaches about 200°F, the starches are fully set and the apples tender. Here is my recommendation.
Troubleshooting
Even experienced bakers sometimes face pie challenges. Here's how to fix them and why they happen.
- Filling too runny → The thickener needs more heat. Flour's starches swell only once they reach about 190°F. Bake until the filling bubbles steadily for five minutes.
- Crust too pale → The oven wasn't hot enough. A hot start activates butter steam, forming layers. Always preheat to 400°F before baking.
- Soggy bottom → Too much liquid or low heat. Bake on the lowest rack or a preheated sheet to crisp the bottom. You can also brush the base crust with egg white before filling to create a barrier.
- Apples too soft → Lower-acid apples break down quickly. Granny smith apples hold shape because their acid strengthens pectin. Always use firm, fresh fruit.
- Crust shrank → The dough was overworked or too warm. Let it rest before rolling so gluten strands relax.
- Filling overflowed → The top crust didn't vent properly. Cut several half-inch vents so steam can escape, preventing cracks and leaks.
Variations, Substitutions, and Storage
Apple pie is versatile, and once you understand the base recipe, it becomes a canvas for creativity. Whether you prefer classic, caramel, or crumb-topped, you can adapt this pie easily.
Variations and Substitutions
- Caramel Apple Pie: Add ¼ cup caramel sauce between apple layers for a richer flavor.
- Crumb Topping: Replace the top crust with butter, flour, oats, and brown sugar for a streusel finish.
- Mini Pies: Line muffin tins with dough rounds and bake for 25-30 minutes for individual servings.
- Gluten-Free: Use a 1:1 gluten-free flour blend for both crust and filling.
- Sugar-Free: Swap granulated sugar with allulose or golden monk fruit blend for the same browning effect.
Serving and Storage
- Serve: Warm slices with vanilla ice cream or whipped cream. The cool cream highlights the spice and warmth of the pie. My husband always wants vanilla ice cream with Apple pie.
- Store: Keep covered at room temperature for up to two days, or refrigerate for up to five days. However, the fresher the better in my opinion.
- Freeze: Cool completely, wrap tightly, and freeze for up to three months. Thaw in the refrigerator, then warm in a 350°F oven for 15 minutes.
- Make-Ahead: Prepare the filling and dough up to two days in advance. Assemble when ready to bake. This is perfect for holidays.

Recipe FAQs
Granny smith apples are ideal because their tartness balances sweetness and their firm texture holds through baking. Their high pectin content naturally thickens the filling. You can mix in Honeycrisp or Fuji apples for variety, but always keep granny smith as the base.
Filling stays loose when starches haven't heated enough to gel. The solution is time and temperature. Bake until bubbling for at least five continuous minutes, and always cool fully before slicing. During cooling, the starches firm and the filling stabilizes.
Start with a hot oven and bake the pie on a preheated sheet pan. Heat from below sets the bottom crust before fruit juices can soak through. Brushing the bottom with egg white or lightly dusting it with flour before adding filling also helps create a barrier.
Salted butter brings out depth of flavor. Salt heightens sweetness and strengthens gluten strands just enough to make a sturdy yet tender crust. The slight saltiness enhances every bite of apple and spice.
Yes. Prepare the dough and filling separately and refrigerate up to two days. You can also freeze the unbaked pie and bake straight from frozen, adding about ten minutes to your bake time. The results will be just as flaky and golden.
The filling should bubble steadily through the vents and the crust should be a deep golden brown. If you check with a thermometer, aim for about 200°F inside. That's when the apples are tender and the filling has thickened.
Softer apples like Gala or Golden Delicious release more liquid and cook faster. You can adjust by adding one tablespoon of extra flour to the filling. Mixing varieties adds flavor dimension, but keeping granny smith as your foundation ensures structure and balance.
Recipe
Perfect Apple Pie Recipe with Homemade Filling
Equipment
- 1 9-inch Glass Pie Dish Ensures even baking and allows you to see when the bottom crust turns golden.
- 1 Rolling Pin Keeps dough uniform and prevents uneven crust thickness.
- 1 large mixing bowl For tossing apple slices evenly with sugar and spices.
- 1 Pastry Blender or Fork Helps cut cold butter into the flour for a tender, flaky crust.
- 1 Set Measuring Cups and Spoons Accuracy matters for both filling and crust.
- Paring Knife or Apple Peeler/Corer Speeds up apple prep while keeping slices uniform.
- Pastry Brush For brushing cream or milk over the crust before baking to achieve an even golden finish.`
- 1 Baking Sheet Place under pies to catch drips and help crisp the base.
- 1 Pie Shield or Aluminum Foil Protects edges from over-browning during baking.
Ingredients
- 2 unbaked 9-inch pie crusts and top crusts - Homemade is always best. See The Best Easy Pie Crust Recipe Flaky & Foolproof, but store-bought works too if you're short on time.
- 2 cups granulated sugar
- ¼ cup all-purpose flour
- 1 tablespoon ground cinnamon
- 1 teaspoon ground allspice
- 12 cups sliced granny smith apples about 10-12 medium apples, peeled and cored
- 4 tablespoons salted butter cut into small pieces
Instructions
- Prepare your pie crusts. Use two unbaked 9-inch pie crusts. Homemade is always best (see The Best Easy Pie Crust Recipe (Flaky & Foolproof)), but a quality store-bought crust works if you're short on time.2 unbaked 9-inch pie crusts and top crusts - Homemade is always best.
- Preheat your oven to 400°F (200°C).
- In a large mixing bowl, combine the sugar, flour, cinnamon, and allspice. Stir until evenly mixed.2 cups granulated sugar, ¼ cup all-purpose flour, 1 tablespoon ground cinnamon, 1 teaspoon ground allspice
- Add the sliced granny smith apples to the bowl and toss gently until all the apple slices are evenly coated in the sugar and spice mixture.12 cups sliced granny smith apples
- Divide the apple mixture evenly between the two prepared bottom crusts, filling each pie shell to the top.
- Dot the tops of each pie with small pieces of salted butter.4 tablespoons salted butter
- Roll out and place the top crusts over each pie. Trim, seal, and crimp the edges to secure the filling inside.
- Cut several small vents in the top crusts to allow steam to escape while baking.
- Place the pies on a baking sheet to catch any drips, then bake at 400°F for 45 to 60 minutes, or until the crusts are golden brown and the filling is bubbling through the vents.
- Remove from the oven and let the pies cool completely on a wire rack. Cooling allows the filling to thicken and set for clean slices.
Notes
- Understanding your apples: Granny Smith apples are naturally high in acid and pectin, which helps the filling thicken without turning mushy. Their tartness balances the sugar perfectly. For a deeper flavor, mix in one or two sweeter apples like Honeycrisp or Fuji, but always keep Granny Smith as the base for structure.
- The science behind perfect filling: Sugar draws moisture out of the apples, while the flour acts as a starch thickener. As the filling bakes, that starch swells and traps the apple juices, creating a glossy, spoonable syrup that sets beautifully once cooled.
- Why cold butter matters: Cold butter melts slowly in the oven, releasing steam that lifts and separates layers of dough. This steam is what gives your crust its flake. If the butter softens before baking, the crust will be dense instead of airy.
- Resting and cooling: Let the baked pies cool completely before slicing. During cooling, the starch molecules in the filling set and thicken. Cutting too soon will cause the filling to run. Patience here makes for bakery-quality slices.
- Homemade vs. store-bought crust: Homemade crust always gives a more flavorful, flaky texture, but if time is tight, store-bought crusts still work beautifully. The key is keeping everything cold before baking.
- Serving tip: Warm slices are lovely with a scoop of vanilla ice cream or a dollop of whipped cream. The contrast between cold cream and warm filling makes every bite taste like comfort and celebration.
Nutrition
What to Bake Next
f you enjoyed this apple pie recipe, try our Whipped Cream for a luxurious topping or our Pumpkin Pie for a Thanksgiving favorite. For a faster option, bake our Caramel Apple Crisp for all the same flavors in half the time.
Thank you for baking from scratch with me today. Real ingredients, real connection, really good baking. That's what The Baker's Table stands for.
If this recipe brought warmth to your kitchen, please leave a comment, rate the recipe, and share it. You can also pin itfor later or join our weekly baking email for more step-by-step baking guidance and encouragement for your family table.
Bake with joy. Serve with love. And remember, every pie you make from scratch builds confidence, one crust at a time.
About Kendra Boettner
Hi, I'm Kendra, wife, mom of three, and the baker behind The Baker's Table. After 20+ years baking at home, including time working in professional kitchens, these are some of my favorite recipes I've learned along the way.
🧁 Want to see more? Join me on Instagram, Facebook, and Pinterest
1️⃣ My 'The Best No Bake Oatmeal Cookie" was my #1 recipe in 2025! Easy and kid friendly!
📋 Here are Kendra's favorite recipes
🍪 Or start with some of our readers' favorites:
- The Best Easy Pie Crust Recipe (Flaky and Foolproof)
- The Best Homemade Brownies (Chewy, Fudgy!)
- Lemon Meringue Bars with Swiss Meringue
- Cake Pucks Made Easy (Cake Pops without the Sticks)
- No-Bake Chocolate Mousse Pie with Oreo Crust
📋 Browse all of my recipes
🔗 The Baker's Table is Featured in:
🔗 Visit the About Me page to learn more about Kendra, Eric, and The Baker's Table!

Comments
No Comments